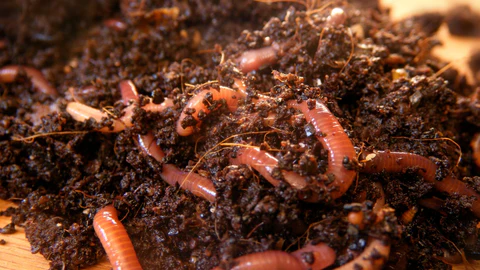
Starting a worm farm at home is a rewarding and sustainable way to reduce waste, improve your garden, and even generate income. Vermiculture, or worm farming, involves cultivating worms to break down organic matter into nutrient-rich compost. Whether you want to compost food scraps, enhance your soil, or explore worm farming as a hobby, it’s a simple yet effective method that can be done in small spaces. Here’s how you can start your own successful worm farm.
1. Understand the Basics of Vermiculture
Before diving into worm farming, it’s essential to understand what vermiculture is and why it works. Worms, particularly red wigglers (Eisenia fetida), are natural composters. These worms eat organic matter like fruit and vegetable scraps, paper, and yard waste. As they digest the material, they produce worm castings—rich, dark, nutrient-dense soil that improves plant growth.
Worm farming can be done in several ways, but the most common methods are using a worm bin or creating a larger outdoor worm composting system. A worm bin is ideal for beginners and can be set up indoors or outdoors, depending on your space.
2. Choosing the Right Worms
Not all worms are suitable for composting. Red wigglers are the most popular choice because they thrive in confined spaces and are excellent at decomposing organic matter. European nightcrawlers are another good option, especially if you want to use them for fishing as well. However, they require slightly different care compared to red wigglers, so it’s important to choose the right species based on your needs.
3. Setting Up the Worm Bin
The next step is setting up your worm bin. You can purchase a ready-made worm bin, but many people prefer to create their own. You’ll need a container, such as a plastic or wooden bin, with a lid. The size of the bin depends on how many worms you plan to keep. A good rule of thumb is one square foot of surface area per pound of worms.
The bin should have ventilation holes to ensure proper airflow, as worms need oxygen to survive. You can drill holes in the sides or use a breathable fabric for the lid. Make sure to elevate the bin slightly to allow airflow from the bottom as well.
4. Preparing the Bedding
Bedding is an essential part of the worm farm. It provides a habitat for the worms and helps retain moisture. You can use shredded newspaper, cardboard, coconut coir, or even leaves. The bedding should be moist but not soggy—think of the consistency of a wrung-out sponge.
Fill your bin with a few inches of bedding, and fluff it up to ensure good airflow. Once the bedding is prepared, it’s time to introduce your worms.
5. Adding the Worms
After preparing the bedding, it’s time to introduce the worms to their new home. Start with about one pound of worms for a small bin. Spread them evenly over the bedding and let them burrow into it. They’ll naturally begin to digest the organic matter you add over time.
It’s important to avoid overfeeding the worms at first. Introduce small amounts of food scraps, such as fruit and vegetable peels, coffee grounds, and eggshells. Avoid meat, dairy, oily foods, and citrus, as these can harm the worms or create odors.
6. Maintaining Your Worm Farm
Maintaining a worm farm requires regular care, but it’s relatively simple. Ensure the bedding stays moist and add more food scraps as the worms consume the previous batch. If the bedding starts to break down too quickly, add fresh bedding to keep the environment healthy.
You’ll also need to check for any signs of stress in the worms, such as escaping or a strong odor. If you notice these issues, it could be a sign that the bin is too hot, too cold, or overfed. Adjusting the conditions can quickly resolve these problems.
7. Harvesting Worm Castings
After a few months, your worms will have turned the organic material into nutrient-rich worm castings. Harvesting these castings is easy. One method is to move the contents of the bin to one side and add fresh bedding and food to the other side. Over time, the worms will migrate to the new bedding, allowing you to scoop out the finished castings.
You can use the castings to enrich your garden soil, making it more fertile and improving water retention. Worm castings are also an excellent addition to potted plants.
8. Troubleshooting Common Problems
While worm farming is straightforward, there are a few common issues that beginners may face. Some problems include:
- Odor: This is usually caused by overfeeding or not having enough ventilation. Ensure your bin has proper airflow and avoid adding too much food at once.
- Worm Escape: If your worms are escaping the bin, it’s often because the conditions are too hot, too cold, or the bin is too moist. Adjust the temperature and moisture levels to keep them comfortable.
- Too Many Worms: If your worms are multiplying too quickly, it could mean they’re overfed. Reduce the amount of food scraps and harvest the castings regularly.
9. Using Worms in the Garden
Once you’ve established a successful worm farm, you can use your worms for more than just composting. Worms are excellent for aerating the soil, improving drainage, and enhancing plant growth. Simply add the worms to your garden beds or use them to create a sustainable composting system outdoors.
10. Conclusion
Starting a worm farm at home is an excellent way to practice sustainability, reduce waste, and create nutrient-rich soil for your garden. With a little effort and attention, you can create a thriving worm farm that provides you with a steady supply of compost and worms for your gardening or fishing needs. By following these simple steps, you’ll be well on your way to becoming a successful worm farmer! Get in touch with us if you are looking for Red worms, earth worm.
